Updated on July 27, 2020
This tutorial provides the steps to customize the output of Genesis Featured Posts using the Custom Genesis Featured Posts Widget plugin and add the CSS to display entries in a 3-column grid.
The title, post info and excerpt (content limit, to be specific) are set to be overlayed on top of the featured image (hidden initially and appear on hover) for the posts in the grid.
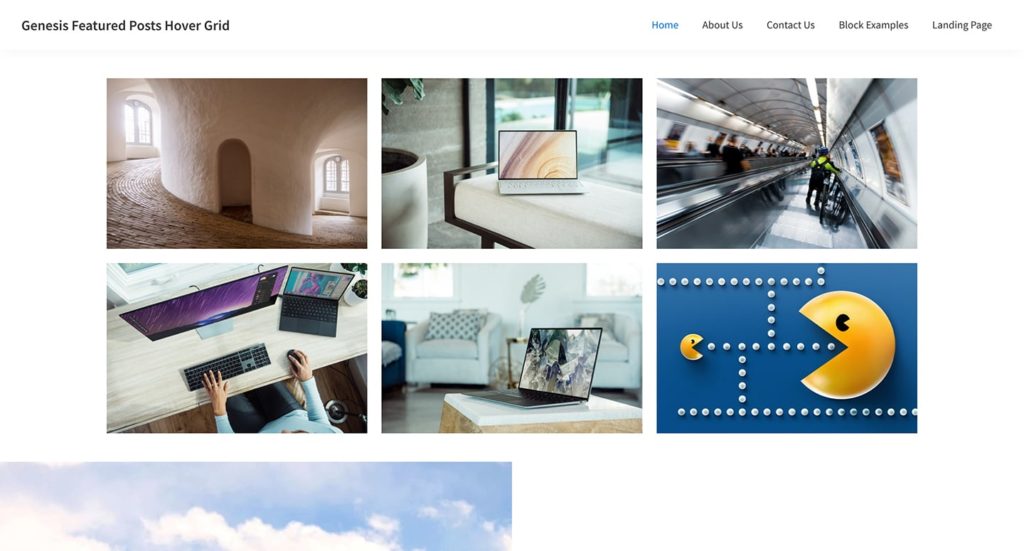
The 3-column grid will be set to appear in 2-columns at medium screen widths (959px and below) and 1-column at mobile screen widths (600px and below).
While the tutorial (CSS styling) has been written for Genesis Sample, it should work in any Genesis child theme with minor changes
Step 1
Let's register a custom image size for the featured images in our grid, register a custom home-featured widget area and display this widget area below the header on front page.
// Register image sizes for images in Home Featured section.
add_image_size( 'home-featured', 500, 327, true );

// Register home-featured widget area.
genesis_register_widget_area(
    array(
        'id'          => "home-featured",
        'name'        => __( "Home Featured", 'my-theme-text-domain' ),
        'description' => __( "This is the home featured section.", 'my-theme-text-domain' ),
    )
);

add_action( 'genesis_after_header', 'sk_home_featured' );
/**
 * Display `home-featured` widget area below the header on front page.
 */
function sk_home_featured() {
    // if this is not the front page, abort.
    if ( ! is_front_page() ) {
        return;
    }

    genesis_widget_area( 'home-featured', array(
        'before' => '<div class="home-featured widget-area"><div class="wrap">',
        'after'  => '</div></div>',
    ) );
}
Regenerate thumbnails if needed.
Step 2
Install and activate Custom Genesis Featured Posts Widget plugin.
Step 3
Let's wrap .entry-header and .entry-content in a custom div.entry-overlay.
Edit plugins/custom-featured-post-widget/class-custom-featured-post.php.
Hi, Sridhar! Great tutorial, thank you? One question- where did the .story-image come from? Am I missing something?
You are welcome.
From class-custom-featured-post.php. https://pastebin.com/raw/cfYkdSP0
Thank you! The figure tag is missing from here https://gist.github.com/srikat/8e7ecf30329462f91e8d15d9ff448aef. That’s what I had missed.
Great tutorial, Sridhar – thanks! Took a little tweaking on the customized theme and homepage I’m working with, but the results were very nice.
Question: I’d like to sort the posts by “menu order”, and normally would do that with the “Amplified” widget (that allows for sorting by meta, etc.) … but, obviously, I’m here working with the Custom Genesis Featured Posts Widget plugin.
Any tips on adding “menu order” to the widget selector field for sorting?
Thanks for any help/direction you can provide…
Why am I getting sent to a spam type page to download some kind of browser thing to chrome when i click the live demo button. This has been happening with a number of links on your site, that are meant to go to demonstrations of the tutorial content.
“Before you continue to wp-demos.com
By clicking the button below you’ll go through a standard security check, after which you will be redirected to Chrome store and will be given the option to install Secured Search extension. This extension will offer you a safer web search experience by changing your default search provider.”
– If they are advertising or affiliate links of some kind, they should be clearly marked as such.
– If the demos are no longer available, then it’s time to do some housekeeping and clean up the defunct links
Hi Bronwyn,
Sorry about the inconvenience.
I’ve updated the tutorial including the demo link.
Indeed. I will gradually do the same with other tutorials as well.
Thanks for your patience.