This members-only tutorial provides the steps to set up a nav menu having the site logo at the center in Genesis Sample 3.4.1.
960px and above:
959px and below:
At smaller viewports we shall set the logo to appear the left with the hamburger menu at the right.
Step 1
Upload your logo image at Appearance → Customize → Site Identity.
Select the option to not crop the image when prompted.
Here's the image used in my test site.
Step 2
At Appearance → Menus, create your desired menu if you have not already.
In the "Pages" area on the left, click "View All", select "Homepage - Front Page" and then "Add to Menu" button.
Drag the newly added Home menu item so it is in the middle with other menu items above and below.
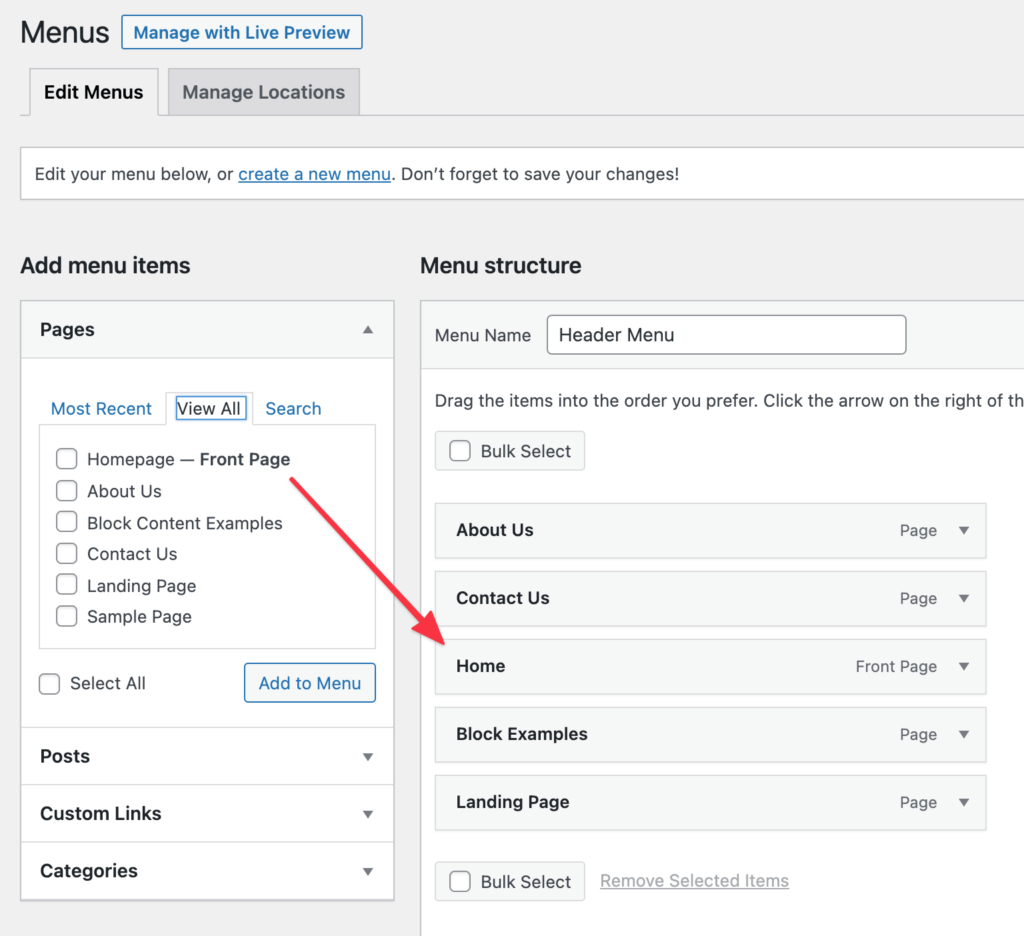
Ensure that display location is set to "Header Menu".
Step 3
At the end of Genesis Sample's functions.php, add
[…] on 19 Sep 2021: Updated tutorial here. This is an updated version of Split Navigation with menu items on logo’s left and right in […]
I had to add “background-repeat: no-repeat” to the .nav-primary li.menu-item-home a {…} to prevent logo being repeated
Updated the tutorial.