In this article I share details on how we can display custom fields added via Advanced Custom Fields Pro (commercial plugin) on the single page of a Projects Custom Post Type in Genesis.
Here are the design goals:
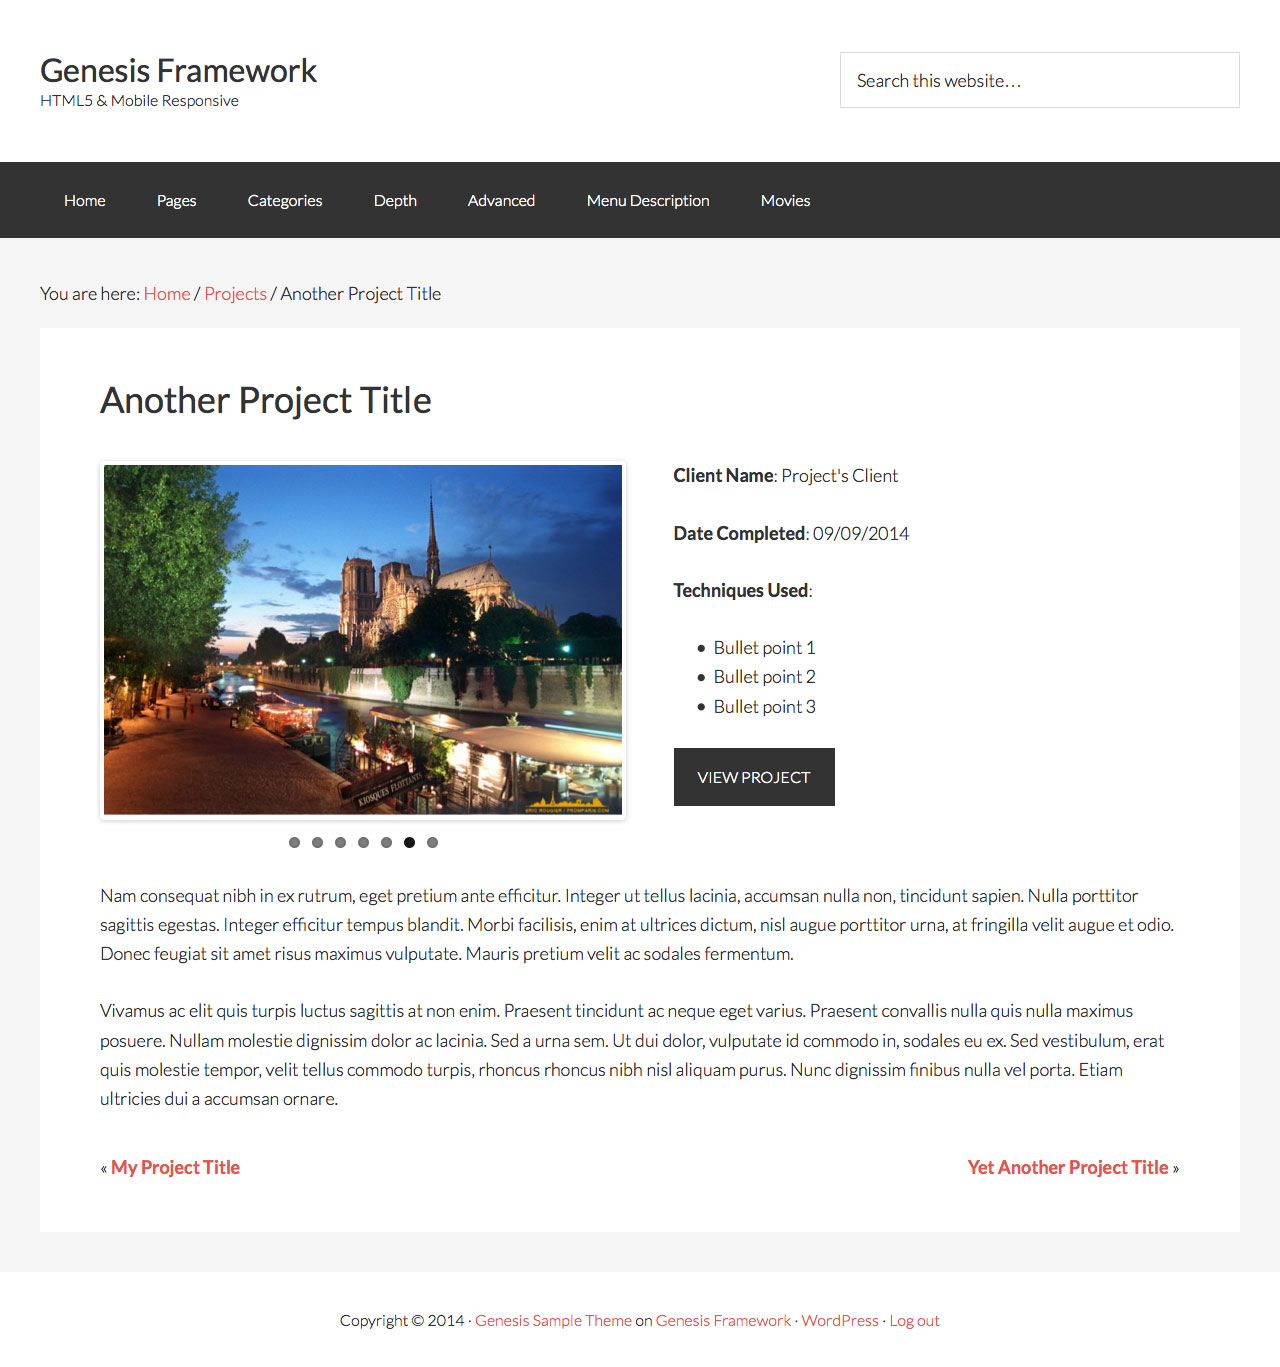
- Images uploaded in the backend should appear as a slider at the left.
- If no images are uploaded in the Gallery field, then Featured Image attached to the entry should appear at the left
- If no Featured Image has been attached, a default image should appear at the left
- Regular custom fields like Client Name, Date Completed appear to the right of slider.
- The entire right div and field labels should only appear if the field values are not empty.
- Project's content to appear below.
- Links to Previous and Next projects.
The Workflow:
- Create Projects CPT and 'Project Type' custom taxonomy.
- Create a 'Client Details' custom fields group containing these custom fields:
- Client Name (Text)
- Date Completed (Date Picker)
- Techniques Used (Wysiwyg Editor)
- Project Link (Url)
- Project Images (Gallery)
- Set this field group to show in Project CPT.
- Set up FlexSlider jQuery script for the slider.
- Create single template file for Projects CPT.
- Style it up.
Create Projects Custom Post Type
Install Types (or your favorite CPT creation/management plugin) and set up a Projects CPT like so:
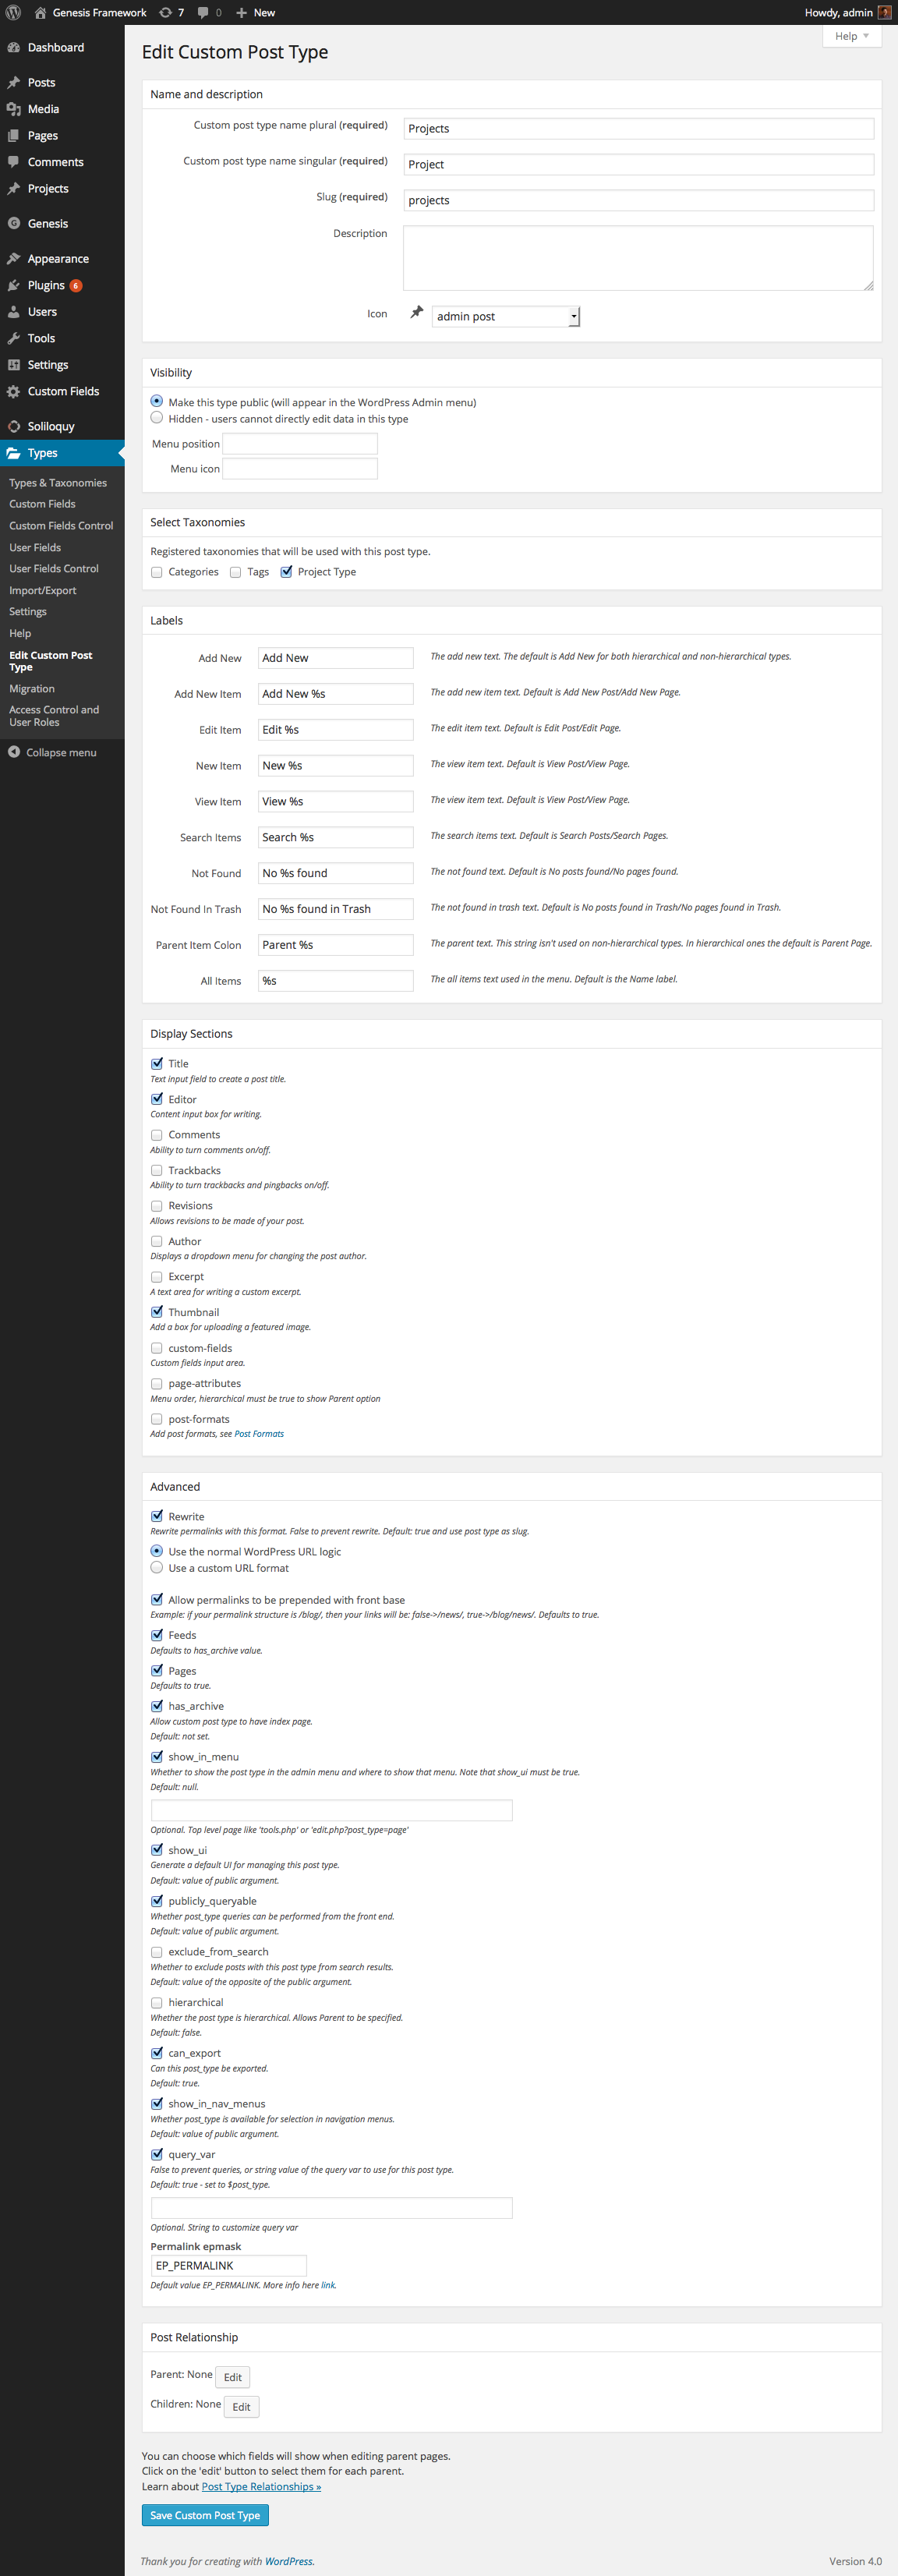
Ensure that Thumbnail support and has_archive are ticked.
Create Project Type taxonomy
[Optional] Create a Project Type custom taxonomy linked to Projects CPT like so:
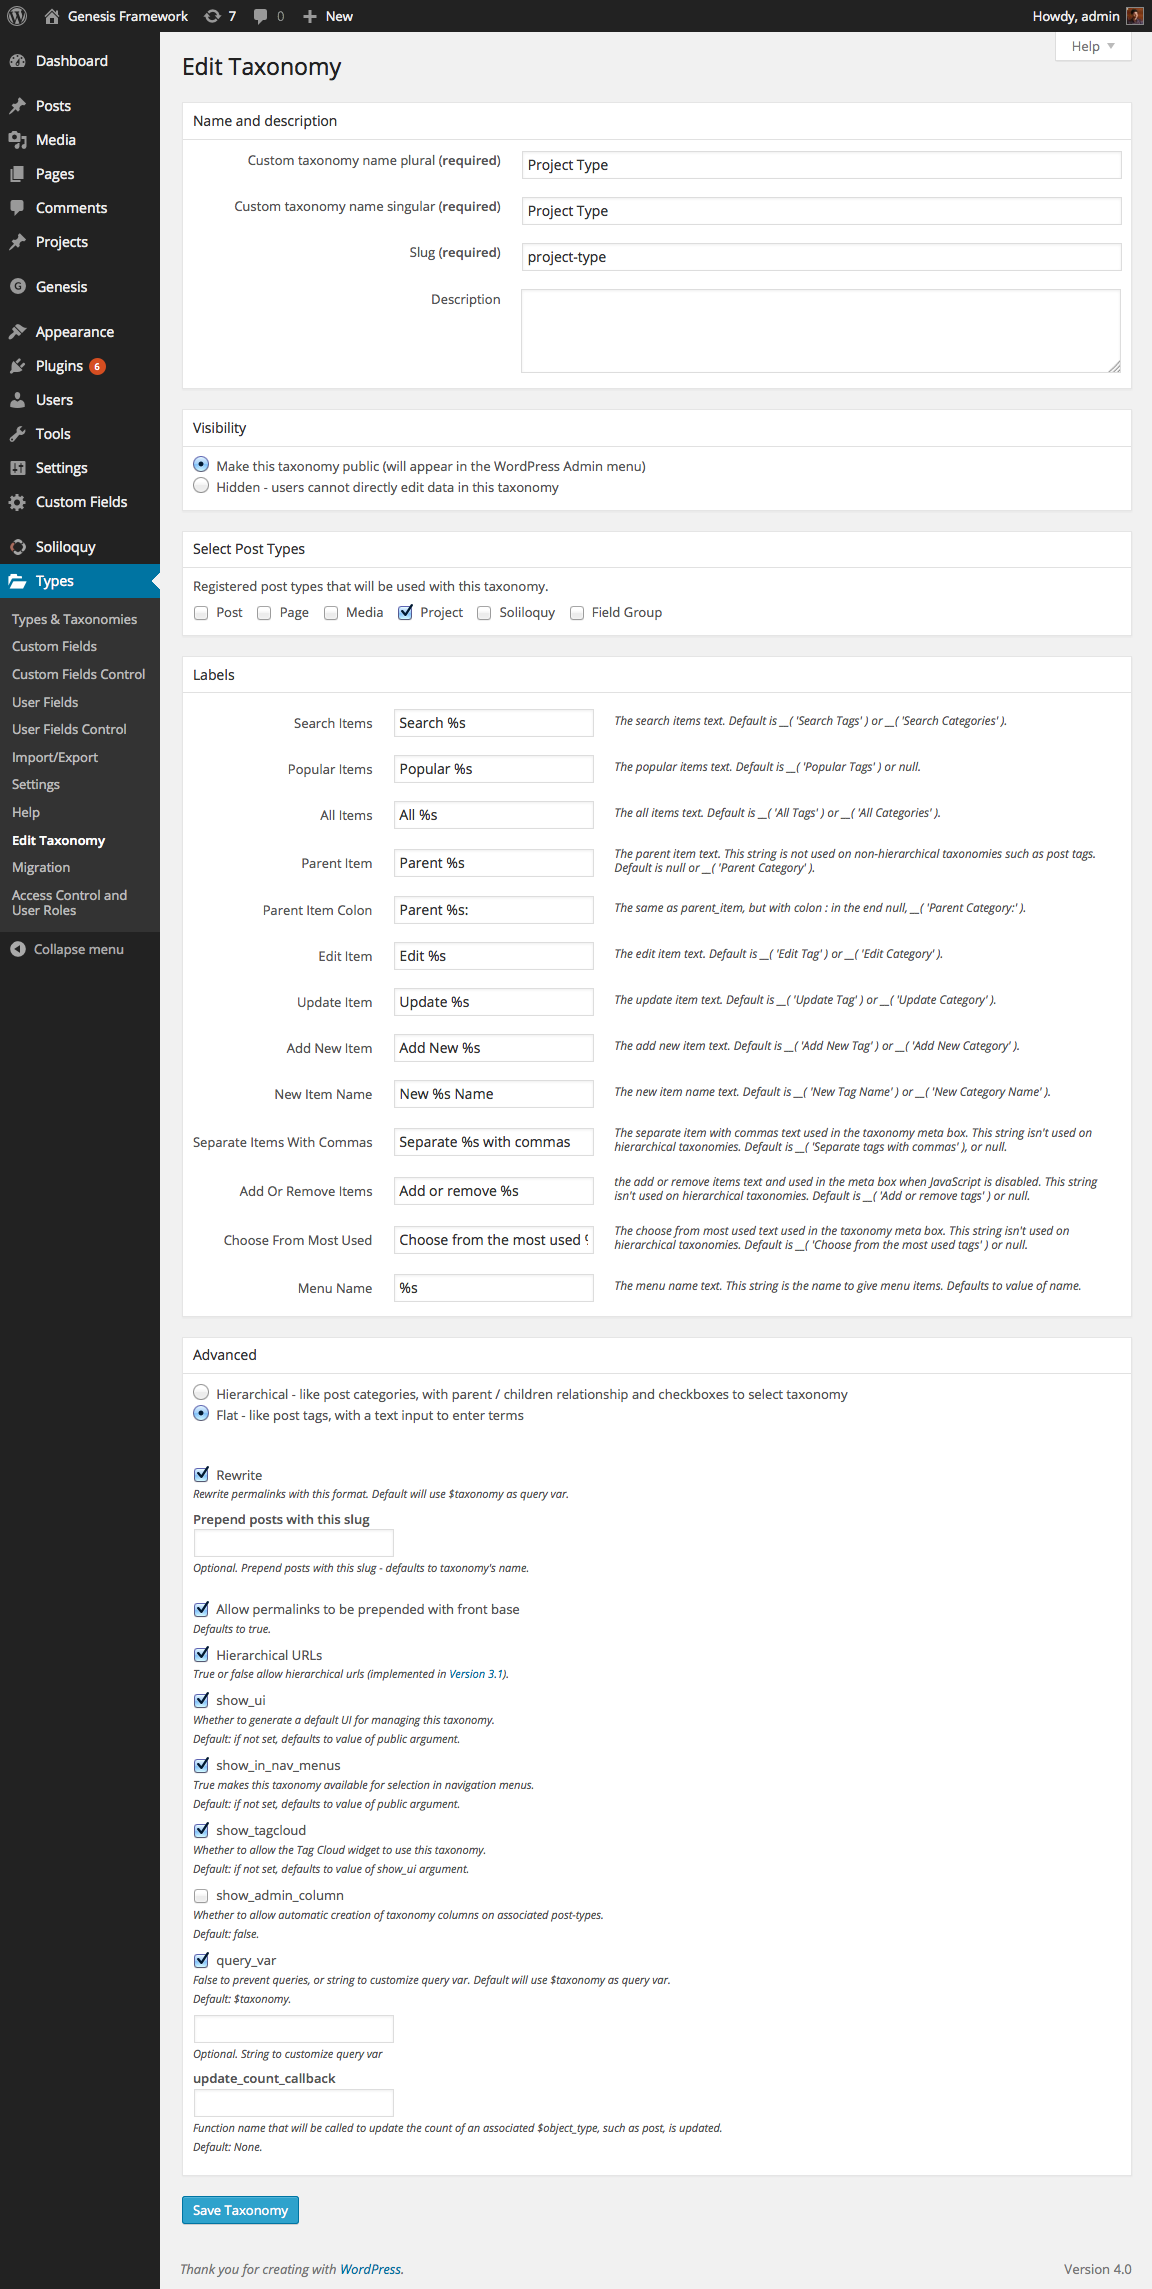
If you would like this taxonomy to work like categories rather than tags, set this to be Hierarchical.
Advanced Custom Fields Pro
Install and activate Advanced Custom Fields Pro.
Create a Client Details group like so:
Excellent post!!!
Is there a way to show (visualize) the custom post with all the custom fields without touching the core of the theme?
My question is because I’m not using Genesis now, and I want to show all the custom fields without modify the theme.
Thanks
Extremely useful tut, could you be so kind of making a variation using Soliloquy instead of flexslider ? Many thanks
Great Tut. Never used ACF and just came here to see workflow, but maybe now I’ll try it.
So if i understand it right ACF is only installed for the slider , all other fields can be fields in CPT
I am sure you can do the same with Types, but custom fields will be displayed differently using this plugin
Sridhar:
Thanks very much for this excellent tutorial!
For Magazine Pro and Daily Dish, all of the H1’s on the sites were pushed down. Because we use Extender, Eric Hamm from Cobalt Apps helpfully suggested the following tweak to CSS lines 28-33
//fix from Eric Hamm
.entry-content h1, .entry-content h3 {
margin-top: 40px;
}
//h1,
//h3 {
// margin-top: 40px;
//}
I am looking to use this tutorial to show my completed websites, however I don’t see how/where there is a url option? I don’t have the Pro version of Advanced Custom Forms (yet), wanted to see it first and I don’t see it in their doc…. any help from anyone?
[…] is an extension of my Single CPT template in Genesis to display ACF custom fields including a Gallery field as a Slider tutorial where I discuss using Soliloquy instead of Flex slider for displaying images of ACF […]
followed the tutorial all the way through, swapped your custom fields for my custom field. Now when i go on the page which has the template attached. it shows nothing on the screen.
Sridhar, thank you so much for this tutorial! You have really gone above and beyond. I’m new to using ACF and now I understand it much better.
I checked your tutorial and correct me if I am wrong – but you never actually used the custom Taxonomy. I am trying to get ACF to work by using a custom Taxonomy and an ACF field that references the taxonomies which I created. Whenever I do this, the results are blank.
Has anyone done this successfully yet?
[…] Single CPT Template in Genesis to Display ACF Custom Fields Including Gallery Field as a Slider […]
Hi Sridhar:
¿How can I add a slider (shortcode or other) in “the one-half first” div? ¿Can I use ACF to add a shortcode?
Thanks
I found that, sorry, using a Wysiwyg Editor field.