Updated on April 11, 2018
In the past, I wrote a tutorial on How to set up Font Awesome icons above menu items in WordPress.
That method involves loading Font Awesome's CSS and showing the icons using pseudo selectors.
This tutorial provides the steps to use the new Font Awesome 5's SVG icons instead.
We are going to add the icons and write CSS so they appear above the primary nav menu items' text in Genesis.
While the tutorial has been written for Genesis Sample 2.6.0, it should work with a few adjustments in any Genesis theme.
Step 1
In this example let's just paste
<script defer src="https://use.fontawesome.com/releases/v5.0.9/js/all.js"></script>
in the Header Scripts text area of Genesis theme settings.
Step 2
At Appearance > Menus, edit the menu that is set to appear in the Header Menu location.
Go to https://fontawesome.com/icons, locate the icon you would like to use for the first menu item and copy its code.
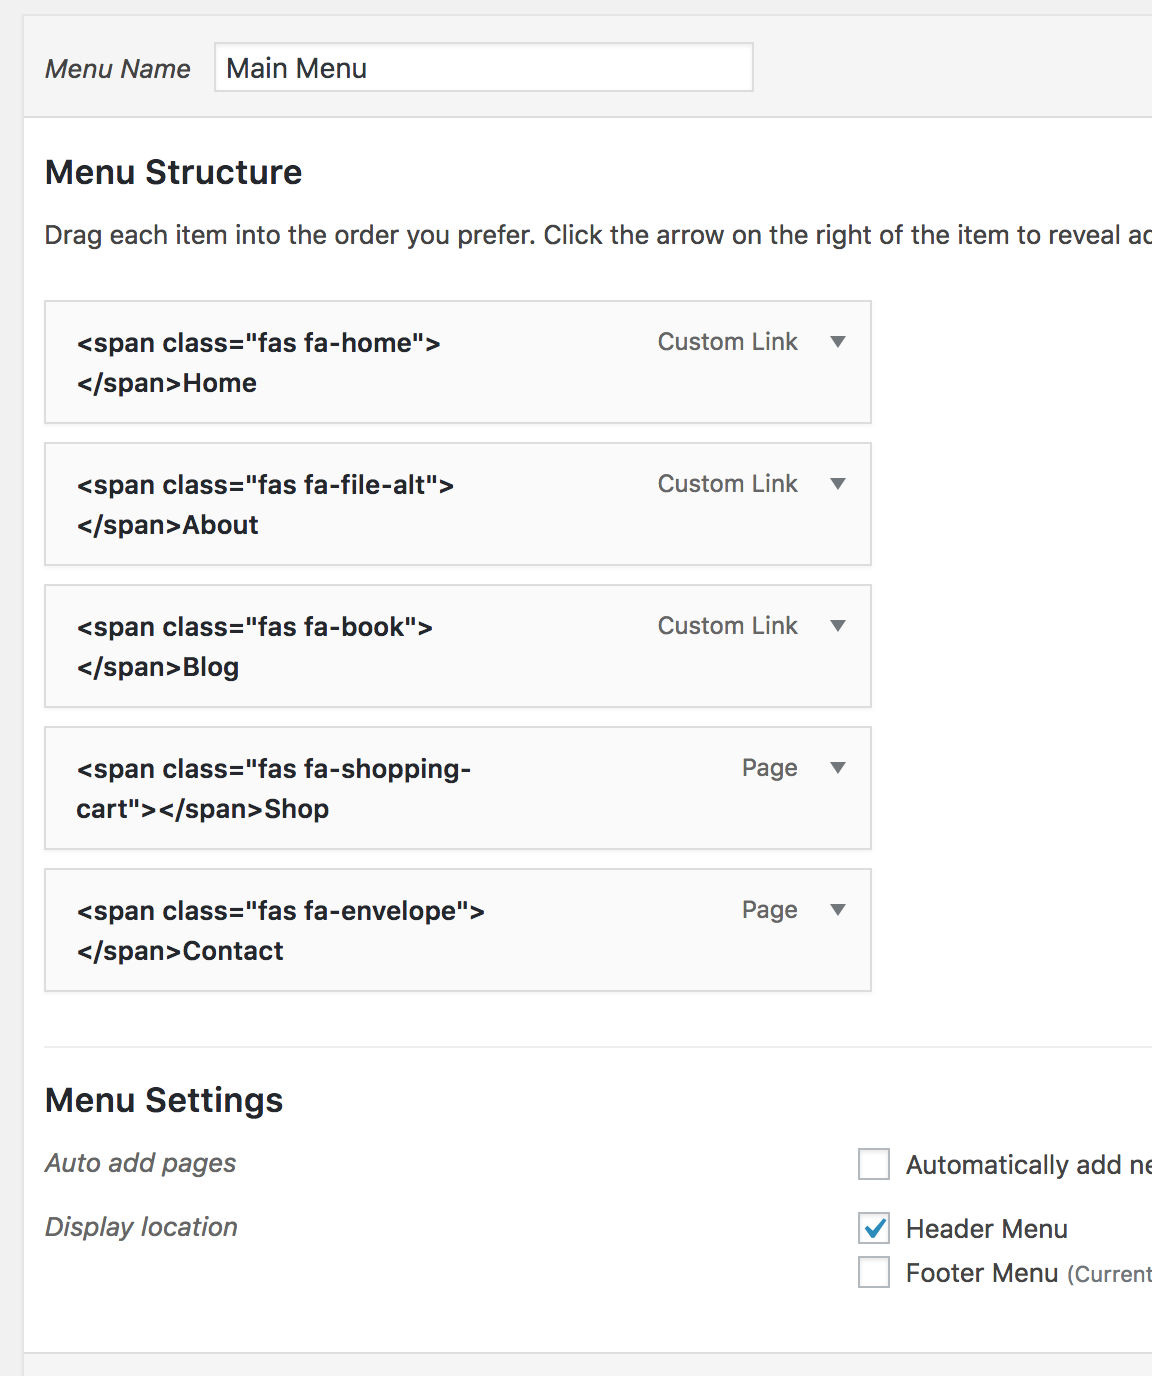
Paste it to the left of the menu item label and replace i in the opening and closing tags with span like so:
Repeat for other menu items.
Save the menu.
Step 3
Add the following in child theme's style.css:
To view the full content, please sign up for the membership.
Already a member? Log in below or here.


